Oil Pastel Still Life
Share:
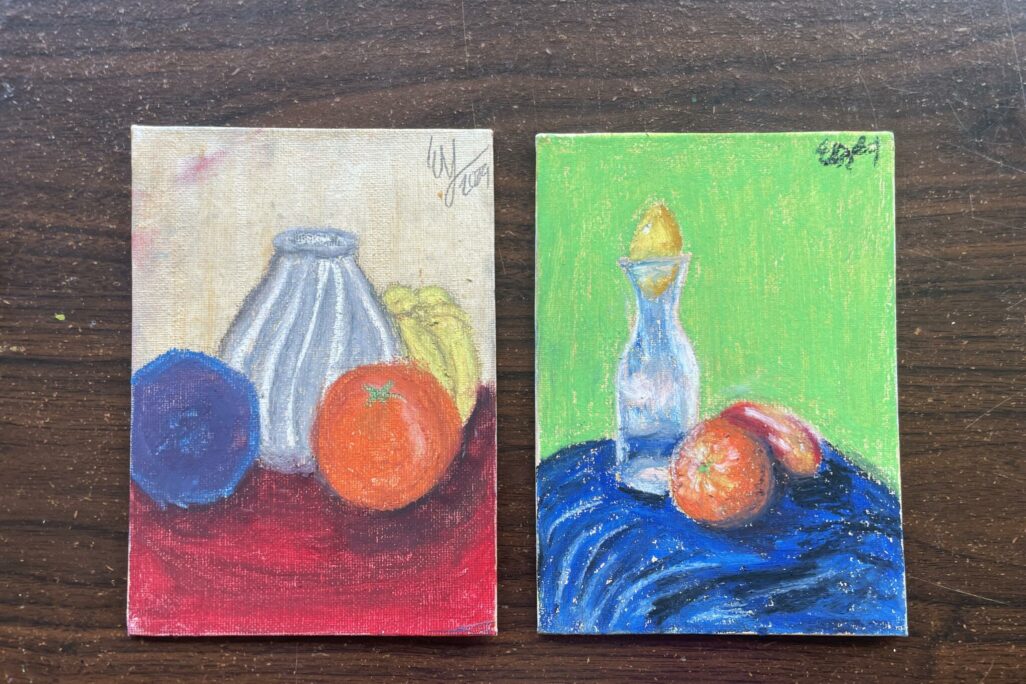
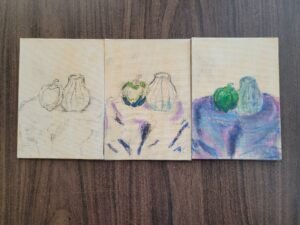
Examples of oil pastel still life artwork you can create!
About
Create your own oil pastel still life inspired by The Multiple Lives of Paintings!
Since the Dutch Golden Age was a time of wealth, many Dutch people could afford to buy paintings. Artists often painted things that they knew would interest their patrons. Many different genres of paintings became popular at this time. Some examples are still life, portrait, and landscape painting.
Still life paintings were usually more than just realistic paintings of objects. The things in these paintings were often carefully chosen for their symbolism. Often, these artworks would tell stories about morals, religious beliefs, or even life and death.
While The Multiple Lives of Paintings doesn’t feature any still life paintings, it does have Dutch Golden Age artworks. Throughout the exhibition, you will also see objects added to paintings for their symbolism.
About the Exhibition
Have you ever thought about the life cycle of a painting? Some paintings in the MacKenzie Art Gallery’s collection are almost 500 years old! A lot can happen to an artwork in that time.
This exhibition looks at four key points in many paintings’ stories:
- The moment of production (when the painting was made)
- The moment of reproduction (when the painting was studied and copied)
- The moment of collecting
- And the moment of research.
In this exhibition, you will see European paintings made between 1500–1800 CE. These artworks are all part of the MacKenzie Art Gallery, University of Regina Collection. You will also see four videos that bring specific artworks to life.
Things to Think About
- Have you ever experimented with different ways of painting or using a specific art medium?
- How do places, cultures and communities affect what artists create?
STUDIO ACTIVITY
 Stage your own still life scene by arranging objects that are meaningful to you. Then draw this scene with oil pastels on canvas, mimicking the look and layering of an oil painting.
Supplies:
- Oil pastels
- Small canvas boards
- Pencils, erasers, and sharpeners, or chalk
- Q-tips or paper towel for blending.
- Objects for still life
- Optional: fabric, box, container for still life setup
- Optional: micellar water for cleanup
Instructions
- On your own or with friends and family, arrange a still life scene with objects that are meaningful to you. You may wish to drape some fabric over a box or container to set your objects on.
- Sketch out your still life on your canvas in pencil. Focus on drawing the outlines of shapes (also called their contours). This step is sometimes called underdrawing or inventing.
- The next step will be dead colouring, or dood-verf (in Dutch). This is a quickly added layer of paint that lets you add values (lights and darks) and change the layout of your painting. Think of this layer as a chance to check your composition. Dead colouring is usually monochromatic (one colour with different values) or uses a small amount of limited colours. Pick 1-3 colours of pastels to use for your dead colouring. Use them lightly over your sketch to add dark and bright areas or colour blocking. Blend the colours and lines with a q-tip, your finger or paper a towel. If your layout doesn’t quite look right at this point, this is a great time to change it.
- The last step in this project is called working up, body painting, or opmaken (in Dutch). Use pastels to colour in and build up your artwork. Try to work on one area of your painting at a time. Blend the pastels with q-tips or our fingers. To make final sharp details, draw on top of the layers you’ve already made with pastel, and don’t blend it out.
Cleaning Tip: Micellar water can be helpful for getting oil pastels off your hands.